検索

質問
· 2020年7月20日

Corner Secure FHIR Sandbox access from production

Hi

Has anyone been able to successfully connect IRIS for Health to Cerner's Secure FHIR Sandbox?

Anyone have any easy instructions for getting this working?

1 Comment
ディスカッション (1)2
続けるにはログインするか新規登録を行ってください
記事
· 2020年7月4日 2m read

Terminal Multi-Line Command Editor

The Command extension enables the execution of Multi-Line Commands from Terminal prompt.

Terminal Multi-Line Input with Edit, Insert, Delete, Print extension for IRIS and Caché
IRIS and Caché have just single command lines in terminal available
This Multi-Line Commands Editor also will execute the Multi-line Commands.
In addition, it is independent of access to %SYS and can be installed in any namespace

Special thanks to @Jeffrey Drumm  who inspired me to this and supported me as beta-tester.

It is tested on IRIS/Caché Terminal , Putty, Linux Console, Docker Console,
Desktop Docker from Windows Command and WebTerminal.

This broad range of terminal emulations required navigation without any <ESC> sequences
as some of them are quite restrictive on input. So it got a little bit feeling like vi.

Installation & Execution

Import ZME.xml to any namespace.

For a system-wide installation in %SYS just rename it from zme to %zme
You may also add this line to your %ZLANGC00.mac for simplified use:

ZME do ^%zme quit  ; add multi line command editor  

Otherwise, just call it from terminal command prompt

  USER>do ^zme  

Usage

at the prompt USER:zme>1
enter commands as usual in terminal
trigger execution by an empty line with

These Editor Commands are implemented:

    USER>d ^zme
 
    Entering multi line mode.
    <enter> => Run multi-line command.
    . => Stop multi-line mode
    .i, .i<line> => Insert new empty line after <line>
    .d, .d<line>, .d<linefrom>:<lineto> => Delete lines
    .p, .p<line>, .p<linefrom>:<lineto> => Show lines
    .? => show this help
    .e, .e<line> => Edit line

    ***** line editing commands *****
    .+ => move edit cursor forward
    .- => move edit cursor backward
    .nn => move edit cursor to position nn
    .r => set mode replace at cursor
    .i => set mode insert after cursor
    .d => delete character at cursor
    <enter> => teminate line editing
    <any character> => replace / insert after cursor
    .. => input single .

    USER:zml>1

GitHub

1 Comment
ディスカッション (1)0
続けるにはログインするか新規登録を行ってください
記事
· 2020年6月29日 2m read

ターミナルやAPIを使用してネームスペースやデータベースを作成する方法

Config.Configurationクラス、SYS.Databaseクラスのメソッドを使用して、ネームスペース・データベースの作成及び登録をターミナルから実行することができます。

以下はデータベースファル/CacheDB/AAA/cache.datを作成し、構成ファイル(cache.cpf)にデータベース AAA、及び、ネームスペースAAAの登録を行う一連の実行例です。 *実行は、%SYSネームスペースで行って下さい。*
 

 Set Directory="/CacheDB/AAA/"
 Set x=$ZF(-100, "/shell", "mkdir", Directory)
 Set db=##Class(SYS.Database).%New()
 Set db.Directory=Directory
 Set status=db.%Save()
 Set DBName="AAA"
 Set status=##class(Config.Configuration).AddDatabase(DBName,Directory)
 Set NSName=DBName
 Set status=##class(Config.Configuration).AddNamespace(NSName,DBName)


リモートデータベースからネームスペースを作成する場合は、以下のデータベース定義で、第三パラメータにリモートのサーバ名を指定します。
 

 Set status=##class(Config.Configuration).AddDatabase(DBName,Directory,Server)


※クラスの詳細については、それぞれのクラスリファレンスをご参照下さい。
また、データベースの作成・登録については、^DATABASEルーチンを使用することも可能です。

このルーチンを実行すると、下記のようにオプションが表示されますので、目的によって選択します。
以下は、データベース作成の実行例です。

*実行は、%SYSネームスペースで行って下さい。*
 

%SYS>do ^DATABASE 1) Create a database
2) Edit a database
3) List databases
4) Delete a database
5) Mount a database
6) Dismount a database
7) Compact a database
8) Show free space for a database
9) Show details for a database
10) Recreate a database
11) Manage database encryption
Option? 1
Database directory? D:\200820DS\Mgr\TEST2
Directory does not exist, create it? No => y
Change default database properties? No =>
Dataset name of this database in the configuration: TEST2
Mount TEST2 Required At Startup? No => y
Confirm creation of database in d:\200820ds\mgr\test2\? Yes => y
Formatting...
Database in d:\200820ds\mgr\test2\ created
Dataset TEST2 added to the current configuration.
Database directory?


※^DATABASEルーチンの各オプションについては、以下ドキュメントページをご参照ください。

^DATABASEについて【IRIS】
^DATABASEについて

3 Comments
ディスカッション (3)2
続けるにはログインするか新規登録を行ってください
記事
· 2020年6月28日 2m read

【はじめての InterSystems IRIS】セルフラーニングビデオ:基本その1:InterSystems IRIS Community Edition をインストールしてみよう!

基本操作編ビデオシリーズ:その1

Windows、Linux、クラウドのマーケットプレイスでの InterSystems IRIS Community Edition インストール方法を解説しています。

コミュニティエディションのインストールキット入手方法については、「InterSystems IRIS/InterSystems IRIS for Health コミュニティエディションのダウンロード方法」をご参照ください。

2025/4/8 追記:バージョン2025.1以降 コンテナ以外のインストールキットを使用したインストールでは、初期セキュリティ設定のオプションデフォルトが「ロックダウン(Locked down)」に変更されました。詳しくは👉「バージョン2025.1インストール時に指定する初期セキュリティオプションのデフォルトが「ロックダウン」に変わりました」をご参照ください。

コンテナ版IRISの利用方法については、「InterSystemsコンテナレジストリの使い方とコンテナ開始までの流れ(解説ビデオ付き)」をご参照ください。

もくじ

0:00 ~ IRIS community Edition インストール方法概要

1:36 ~ WindowsでのIRISインストール

11:24 ~ LinuxでのIRISインストール

20:50 ~ マーケットプレイス(Azure)

29:45 ~  Docker Hub (Docker for Windows)

※2023/7/14追記:コンテナ版IRISは「InterSystemsコンテナレジストリ」に公開するように変更となりました。使い方について詳しくは以下記事をご参照ください。
InterSystemsコンテナレジストリの使い方とコンテナ開始までの流れ(解説ビデオ付き)

36:18 ~ TRY-IRIS(インターシステムズプライベートクラウド)

※2023/2/20追記:TRY-IRISページが大幅にリニューアルされ、ユーザ登録が不要となりました。
使い方について詳細は、「Developer Hub:チュートリアルのご紹介」をご参照ください。

※YouTubeでご覧いただくと、もくじの秒数にジャンプできます。

2 Comments
ディスカッション (2)1
続けるにはログインするか新規登録を行ってください
記事
· 2020年6月26日 1m read

Use Third Party Charting Libraries Today In Your Analytics Dashboard!

Now available on Open Exchange is a library of third party charts available to use within DeepSee/InterSystems IRIS BI dashboards. To start, simply download and install, select the new portlet as the widget type, then select the chart type that you desire. If you don't find the type of chart you are looking for, you can easily extend the portlet to implement your desired chart type. These new chart types can be used within existing dashboards or you can create new dashboards using them.

After installing, the portlet can be selected and configured as follows:
1) Add a new widget to your dashboard

2) Select Portlets, then Highcharts, then assign your data source

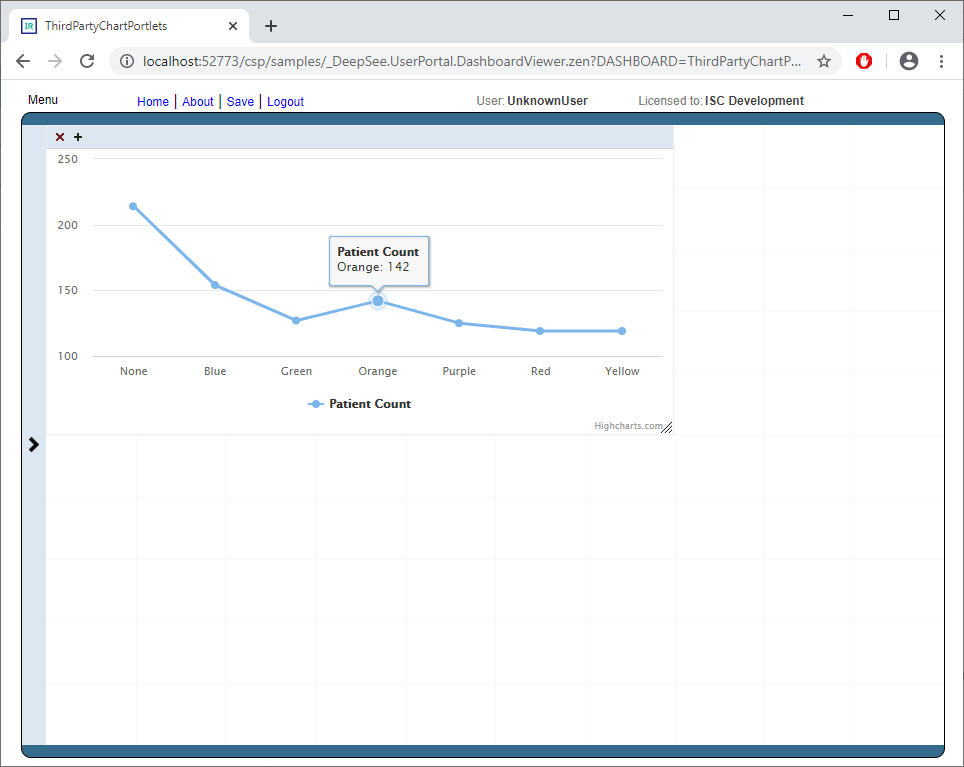
3) The widget will default to a line chart

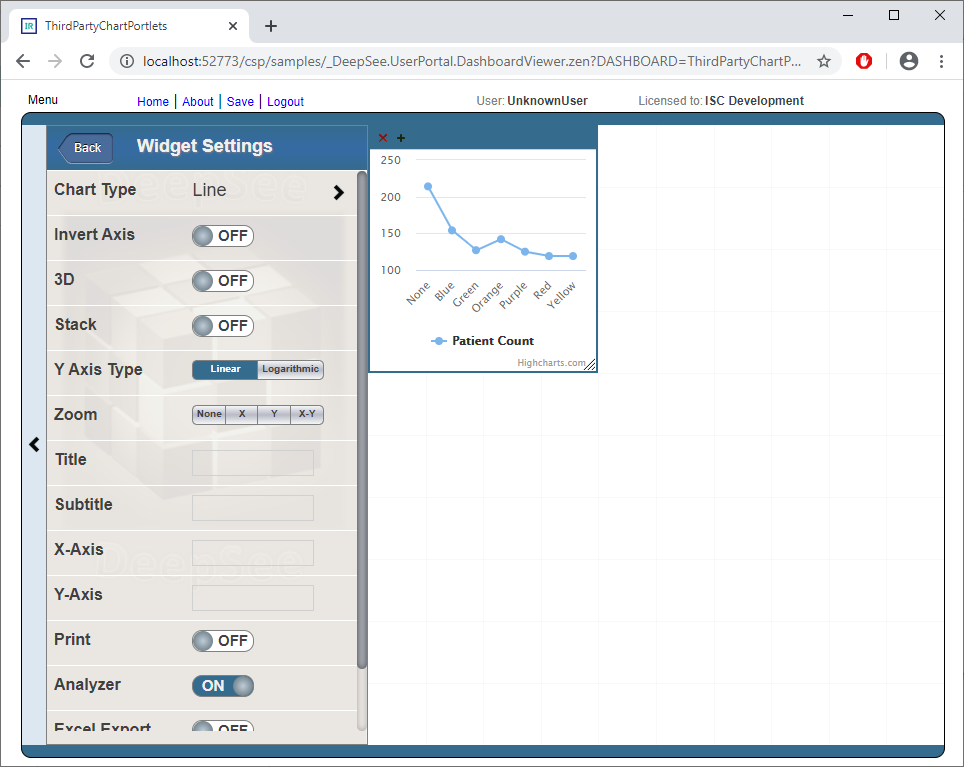
4) Navigate to the Widget Settings to change the Chart Type if desired

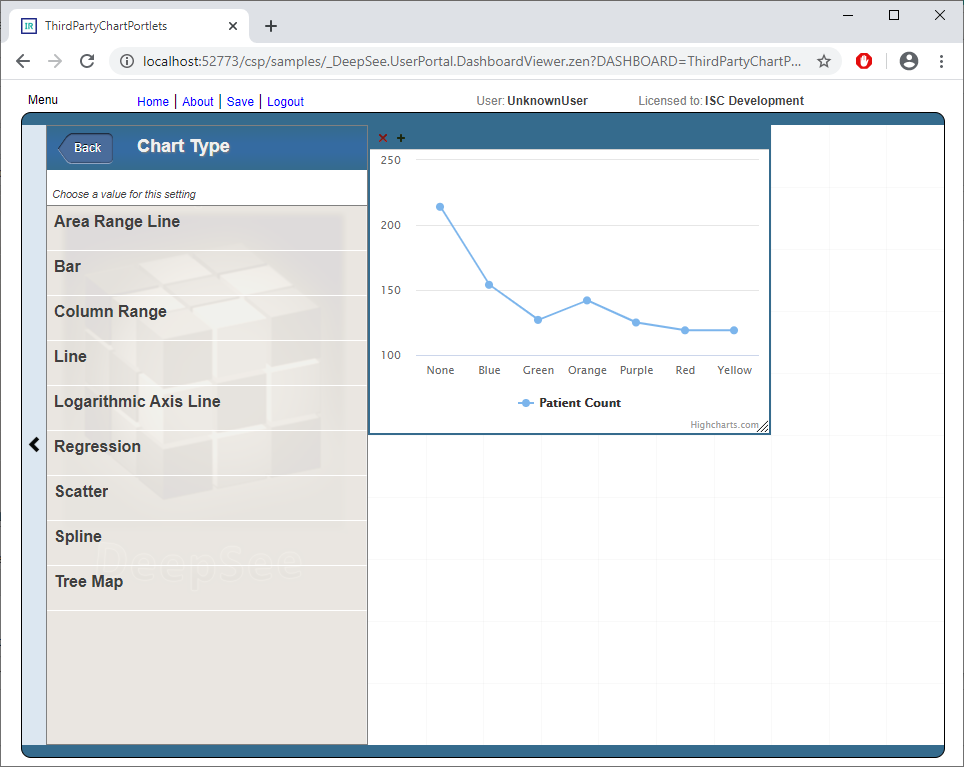
5) Select the desired chart type (I will choose "Bar" for this example)

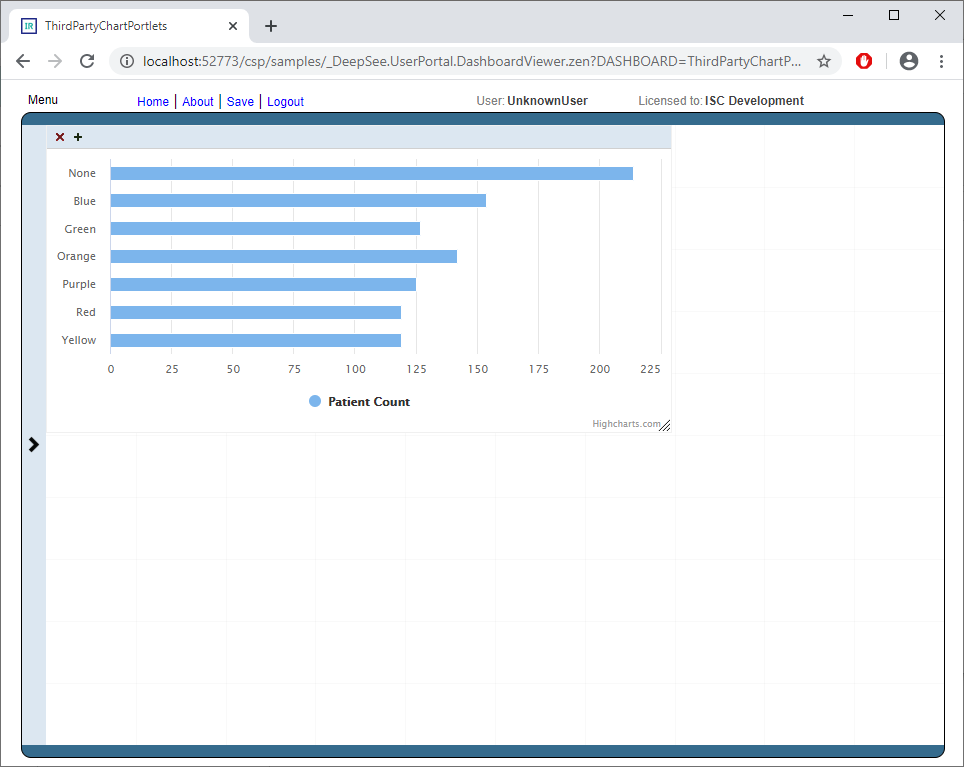
6) Data is now rendered using the new chart type

ディスカッション (0)1
続けるにはログインするか新規登録を行ってください